ASP NET Core Client-side libraries management with VS 2017 Library Manager
ASP NET Core Client-side libraries management with VS 2017 Library Manager
Few weeks ago I discussed how we could create a healthchek library which would return json status of our application. Using the json, I wanted to make a quick page to display healthchecks in a nice visual. I wanted to quickly add Bootstrap and momentJS. For frontend libraries, I was used to use Bower as it nicely put every frontend package in /bower_components which can be served as static data. But since Bower was announcing that it was no longer supported and requested to use Yarn or NPM, I started to look around for an easier solution than those as I don’t really care about source code of the frontend libraries, all I want is the latest compiled versions. After few minutes of research, I found out that the team in Microsoft felt the same way as I did and already worked on a tool called Library manager (libman) and is available in VS Preview for the moment. Libman gives the benefit to allow developers to download locally the latest compiled version of the CSS or JS of their preferred frameworks for frontend usage. We can see Libman as a CDN file management for local usage. Today I will show how it can be used and combined with Razor pages to bring quickly pages to life. This post will be composed of three parts:
- Enable Library Manager
- Configure Bootstrap
- Create a simple site with Razor pages
1. Enable Library Manager
Before starting, make sure that you are on Visual Studio 2017 Preview 15.7.0.
First thing to do is to right click on the project and select Manage Client-Side Libraries.

After that we have enabled it, we will have a libman.json file. Right click on the libman.json file then select Restore on build.

This will have as effect to download locally the libraries to the destination specified in the libman.json.
2. Configure Bootstrap
Now that we have Libman setup, we want to be able to use Bootstrap 4.1.0 for our website. To do that we would normally use CDN links:
<link rel="stylesheet" href="https://cdnjs.cloudflare.com/ajax/libs/twitter-bootstrap/4.1.1/css/bootstrap.min.css" />

<script src="https://cdnjs.cloudflare.com/ajax/libs/jquery/3.3.1/jquery.slim.min.js"></script>
<script src="https://cdnjs.cloudflare.com/ajax/libs/popper.js/1.14.3/popper.min.js"></script>
<script src="https://cdnjs.cloudflare.com/ajax/libs/twitter-bootstrap/4.1.1/js/bootstrap.min.js"></script>
But thanks to Libman, we can download locally the libraries by configuring the libman.json file:
{
  "defaultProvider": "cdnjs",
  "libraries": [
    {
      "library": "[email protected]",
      "destination": "wwwroot/lib/jquery",
      "files": [
        "jquery.slim.min.js"
      ]
    },
    {
      "library": "[email protected]",
      "destination": "wwwroot/lib/popper.js",
      "files": [
        "umd/popper.min.js"
      ]
    },
    {
      "library": "[email protected]",
      "destination": "wwwroot/lib/bootstrap",
      "files": [
        "css/bootstrap.min.css",
        "js/bootstrap.bundle.min.js"
      ]
    }
  ]
}
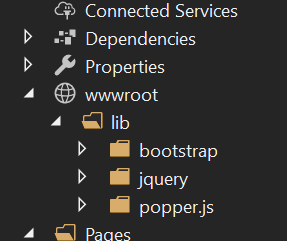
By setting the destination to wwwroot/lib/xxx, the package will be dowloaded to the wwwroot folder which is the default folder served by ASP NET Core static file.
3. Create a simple site with Razor pages
Razor pages work similarly as Razor views with the only difference that they are standalone and do not require controllers.
Link to official documentation
3.1 Routes
Razor pages are placed in a /Pages folder and use folder structure to define their routes. For example:
- /Pages
 | - _Layout.cshtml
 | - _ViewImports.cshtml
 | - Index.cshtml
 | - Contact.cshtml
 | - /Projects
     | - Index.cshtml
     | - MyProject.cshtml
This folder structure will yield the following route tree:
/
/Contact
/Projects
/Projects/MyProject
3.2 Model
A Razor page can optionally define a model class which can handle HEAD, GET and POST by adding a function prefix by on. For example:
public class IndexModel : PageModel
{
    public void OnGet()
    {
        // load the values
    }

    public IEnumerable<string> Values { get; set; }
}
This will get called automatically when the page is requested.
It is also possible to add extra POST handlers using the tag helper asp-page-handler:
<button type="submit" asp-page-handler="test" asp-route-data="@somedata">Test</button>
And from the model class we have the handler:
public Task OnTestAsync()
{
    // do something
}
3.3 Layout, ViewImports and tag helpers
Just like Razor views, we have access to layouts, view imports and tag helpers.
If you never seen Razor, you can have a look at my previous blog post on Razor syntax and helpers.
We start by defining the _ViewImports.cshtml where we globally load all tag helpers:
@addTagHelper *, Microsoft.AspNetCore.Mvc.TagHelpers
Next we create a common layout _Layout.cshtml for all pages.
<!DOCTYPE html>
<html>
<head>
    <meta name="viewport" content="width=device-width" />
    <title>Libman</title>
    <environment names="Development">
        <link rel="stylesheet" href="~/lib/bootstrap/css/bootstrap.css" />
    </environment>
    <environment names="Production">
        <link rel="stylesheet" type="text/css" href="~/lib/bootstrap/css/bootstrap.min.css" />
    </environment>
</head>
<body>
    @RenderBody()
    <environment names="Development">
        <script src="~/lib/jquery/jquery.slim.js"></script>
        <script src="~/lib/popper.js/umd/popper.js"></script>
        <script src="~/lib/bootstrap/js/bootstrap.bundle.js"></script>
    </environment>
    <environment names="Production">
        <script src="~/lib/jquery/jquery.slim.min.js"></script>
        <script src="~/lib/popper.js/umd/popper.min.js"></script>
        <script src="~/lib/bootstrap/js/bootstrap.bundle.min.js"></script>
    </environment>
</body>
</html>
This layout loads the libraries and make use of the environment tag helper to load the minified version for Production.
Lastly every page can make use of the layout, for example here the index page Index.cshtml:
@page
@{
    Layout = "_Layout";
}

<h1 class="display-1">Welcome to Libman test.</h1>
<p>Hello world!</p>
When navigating to the site, we should now see our welcome message with Bootstrap style!
Full source code available on my GitHub
Conclusion
Today we saw how to we could use Libman to manage client site libraries. We also saw how we could leverage Razor pages to start building a site using Razor. Hope you liked this post! See you next time!
Comments
Post a Comment