Let’s Encrypt for ASP.NET Core application on IIS
Let’s Encrypt for ASP.NET Core application on IIS
Few weeks ago we saw how we could generate a SSL cert for free using a browser based ACME implementation. While doing that, we had some manual process for the verification to happen, either by changing the DNS settings or making a key available on an endpoint and at the end we were handling the key to upload it to our server. Today we will see how we can achieve that with an automated verification process and without manual handling of the secrets using IIS and win-acme.
- Register application on IIS
- Setup SSL with
win-acme
1. Register application on IIS
ASP.NET Core runs on top of Kestrel. Kestrel was designed to be fast and lightweight therefore does not have all the functionalities that other application servers provide like IIS, Apache or nginx. Therefore for Windows Server, it is recommended to place Kestrel behind IIS.
For example, one of the reason why is that only one application can listen to the HTTP port at a time on a machine. IIS can then act as a reverse proxy and redirect to all different Kestrel processes within the machine. Another example is that IIS can perform SSL termination and as we will see here, it is possible to install an ACME implementation on IIS to automate the NS verification and automatically configure SSL.
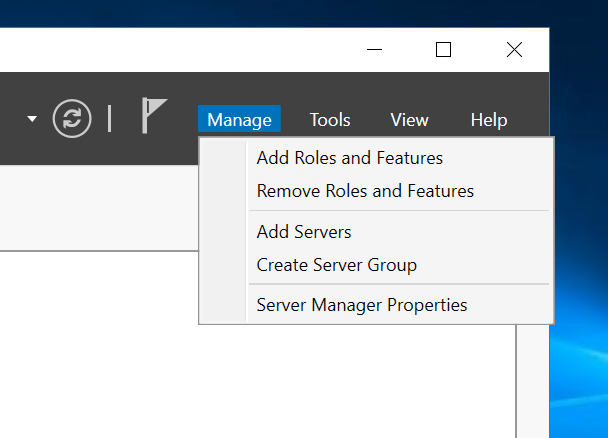
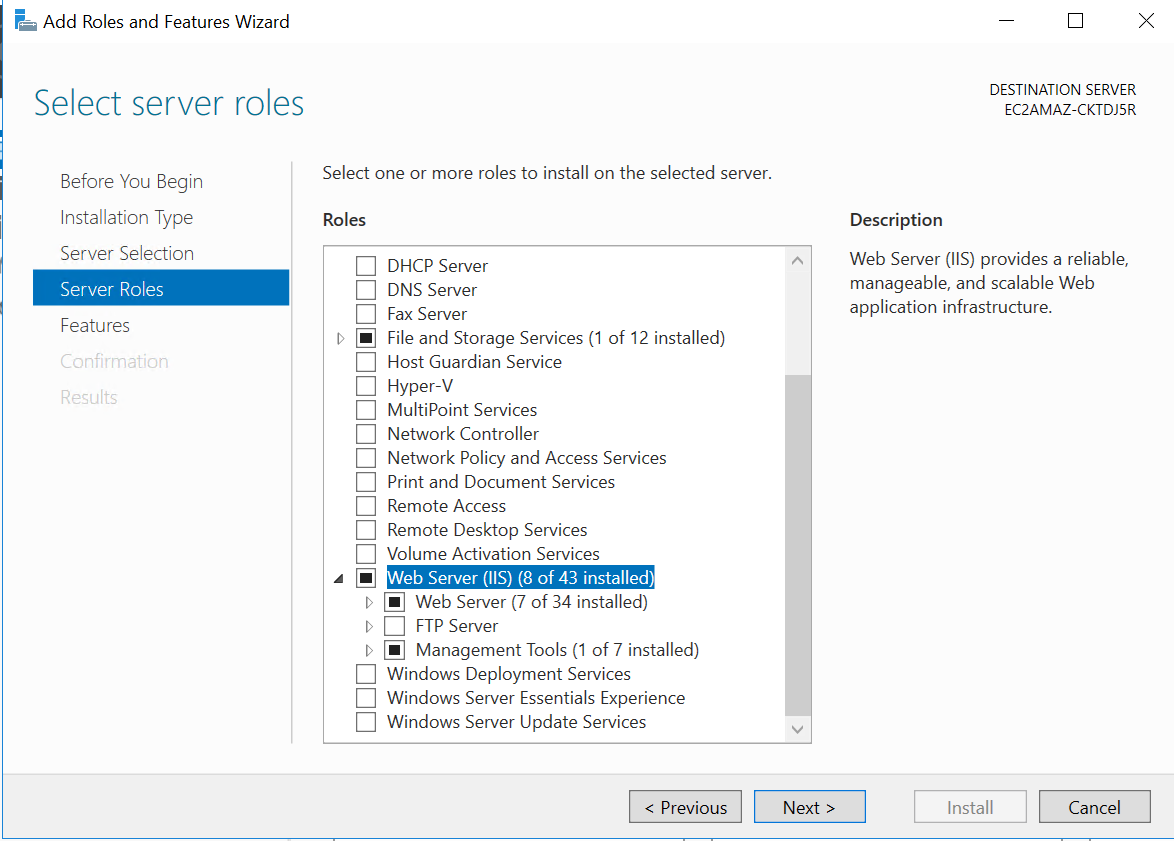
So the first step, coming from an empty Windows Server 2016 instance, we can start by installing IIS by activating from Add Roles And Features from Manage on the Server Manager.
Follow the steps and select IIS from the wizard:
Next we can head to the release notes of dotnet core and grab:
- the runtime https://github.com/dotnet/core/blob/master/release-notes/download-archives/2.0.6-download.md#net-core-206
- the AspNetCore module https://github.com/dotnet/core/blob/master/release-notes/download-archives/2.0.6-download.md#windows
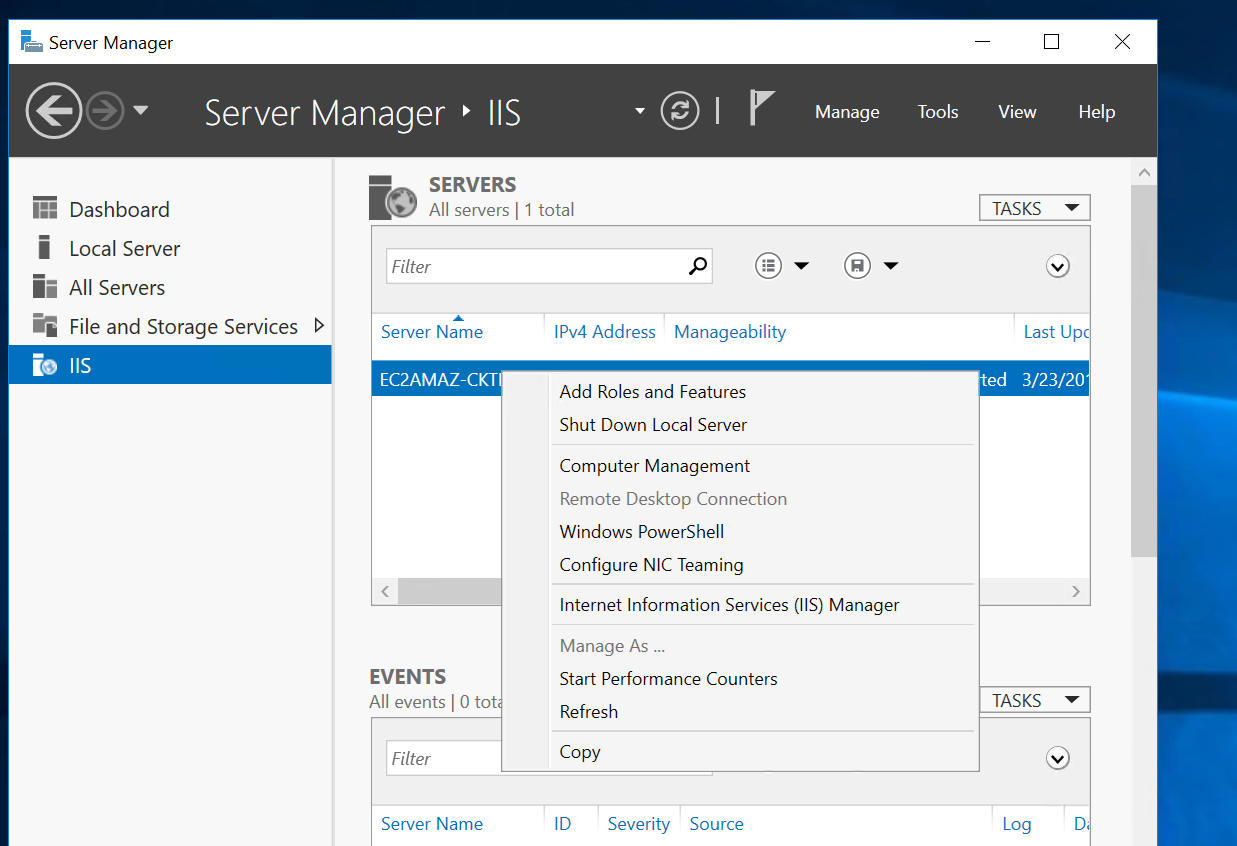
Now that we have IIS setup with the module setup, we can access the console from the IIS section in the Server Manager.
Then we can copy our dll’s on the machine and create a website in IIS console to point to the folder.
On the application pool, make sure to specify No Managed code for the .NET CLR version as ASP.NET Core is not managed by IIS, it does not need IIS to load any libraries to support the runtime of the application as everything is handled by Kestrel.
Once this done, we should be able to access our process from internet.
2. Setup SSL with win-acme
When we navigate to our website we see that it is insecure.
In order to provide a valid cert for our SSL, we need an implementation of the ACME protocol. The easiest way is to get the ACME CLI win-acme. https://github.com/PKISharp/win-acme
Before following the next steps, make sure to have setup your domain and have setup your DNS settings to point to your instance.
Once win-acme downloaded, place it somewhere on the VM and add it to the path. Then simply run letsencrypt and you will be prompted with the menu. Follow the instruction and the CLI will verify that you own the domain and setup your SSL automatically. The following example shows how I setup SSL while recycling my domain groomgy.com.
PS C:\Users\Administrator> letsencrypt

 [INFO] A Simple ACME Client for Windows (WACS)
 [INFO] Software version 199.0.6627.37462 (RELEASE)
 [INFO] IIS version 10.0
 [INFO] ACME server https://acme-v01.api.letsencrypt.org/
 [INFO] Please report issues at https://github.com/PKISharp/win-acme

 N: Create new certificate
 M: Create new certificate with advanced options
 L: List scheduled renewals
 R: Renew scheduled
 S: Renew specific
 A: Renew *all*
 V: Revoke certificate
 C: Cancel scheduled renewal
 X: Cancel *all* scheduled renewals
 Q: Quit

 Please choose from the menu: N

 [INFO] Running in Simple mode

 1: Single binding of an IIS site
 2: SAN certificate for all bindings of an IIS site
 3: SAN certificate for all bindings of multiple IIS sites
 4: Manually input host names
 C: Cancel

 Which kind of certificate would you like to create?: 4

 Enter comma-separated list of host names, starting with the primary one: groomgy.com, www.groomgy.com

 [INFO] Plugin Manual generated target [Manual] [2 bindings - groomgy.com, ...]

 1: Default Web Site
 2: Groomgy

 Choose site to create new bindings: 2

 [INFO] Authorize identifier: groomgy.com
 [INFO] Cached authorization result: valid
 [INFO] Authorize identifier: www.groomgy.com
 [INFO] Cached authorization result: valid
 [INFO] Installing with Create or update IIS bindings...
 [INFO] Adding new https binding groomgy.com:443
 [INFO] Adding new https binding www.groomgy.com:443
 [INFO] Committing 2 binding changes to IIS
 [INFO] IIS will serve the new certificates after the Application Pool IdleTimeout has been reached.
 [INFO] Adding renewal for groomgy.com
 [INFO] Next renewal scheduled at 2018/5/17 3:07:33 PM
As we can see the tool will run the authorization checks for all the domains specified. For myself, I ran it prior therefore it used the cached results. Next it will install directly the SSL certs into the Certificate - Local Machine/Web Hosting/Certificates location in the certificate store and finally added the route bindings for the website selected. Lastly it scheduled a renewal for the certificate.
And that closes this post! We now have an ASP.NET Core application running in a Windows Server serving on HTTPS using ACME protocol and Let’s Encrypt!
Conclusion
Today we saw how we could quickly get an ASP.NET Core application hosted on a Windows Server VM behind IIS. We also saw how we could issue a SSL cert using an automated verification of domain with ACME protocol and Let’s Encrypt. Hope you like this post, see you next time!
Comments
Post a Comment